Covid-19 has drastically changed how many of us do business, and many of our clients have needed to communicate how they have been impacted by Covid-19. One way to keep everyone informed during these uncertain times is to send emails (you have probably received an inbox full of these in the last few days).
An even easier way is to add a banner to your website.
With a banner message, you can let your visitors know:
- if you are still open for business
- any restrictions you currently have in place
- any changes to the situation as they occur
To add a banner to your website you first need to add the banner functionality. There are several ways this could be done. In this case, due to the urgency that Covid-19 has brought to the business world, we have settled on using a WordPress plugin named “Simple Banner“. Please note that we have not developed this plugin ourselves. Instead, we have chosen an external third-party plugin and thoroughly tested it and run it through our plugin picking steps.
The Steps

The finished product.
Step 1 – Go to your website’s plugin section
Log into your WordPress website and head to the ‘Plugins’ section.
Step 2 – Add the plugin ‘Simple Banner’
Click the ‘Add New’ button and using the ‘search plugins’ search box type in ‘Simple Banner’. This is the name of the plugin we will be using to add the banner to your website.
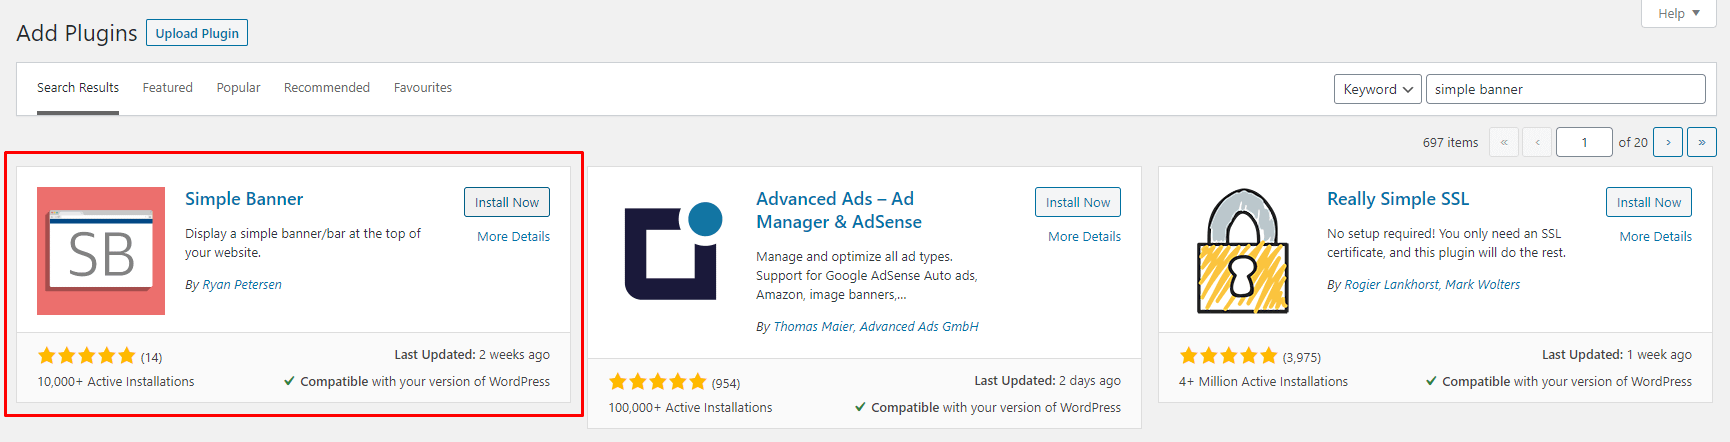
The “Simple Banner” plugin.
Step 3 – Install the plugin
Once the ‘Simple Banner’ plugin has been found install it by clicking on the ‘Install Now’ button. This is will take a few moments after which you can activate the plugin by clicking on the ‘Activate’ button.
Step 4 – Find the plugin’s settings menu
Once the plugin has been successfully installed and activated a new side menu option will appear titled ‘Simple Banner’. Click this to head to the settings of the plugin and configure your banner. This side menu is the large vertical menu found on the left-hand side of the screen.
Step 5 – Customise your banner
Simple Banner offers several options to customise your banner message. The screenshot below shows an already configured banner that is using a custom background colour and a link.

Simple banner’s settings.
Step 6 – Customise the colours
Customise the colours of the banner to make the message stand out and get your user’s attention. In most cases, a simple warning colour like red, yellow or orange will do the trick. To change the background colour you can either add in your own hex colour code or use the colour picker to select a colour.
For reference, the background colour used in the example above has the following hex code: #FFCC00. Both the text colour and link colour can be adjusted in the same way.
Step 7 – Add your message
Simple banner has made it easy to add in a link to your banner message. This link might point to another page on your website that offers more information, as shown in the example above.
The easiest way to do this is to copy the example link text ( COVID-19: Products & Services Are Available. <a href=”/covid-19“>Learn more</a> ) and paste it into the ‘Simple Banner Text’ textbox. Making sure you change the example text and link path (highlighted orange) to your own.
Step 8 – Save your settings
Once you are satisfied with how your banner looks save it and make it live by scrolling down to the bottom of the page and clicking the ‘Save Changes’ button.
Finished!
That’s it. You have successfully added a Covid-19 banner to your website. Now you don’t need to keep sending all those emails!
If you have any questions or require additional work we are still business as usual at Mogul and are here to help.
